How to light a talking-head video with one light
One soft light in the right place beats three in the wrong ones: where it goes, how high and how close, a white bounce for fill, and camera settings to match.

Chapters
In short
Put one large, soft light about 45 degrees to the side of your camera, its center 1 to 2 feet above your eyes, 2 to 3 feet from your face at a desk or 3 to 4 feet out in the room, and bounce it back into the shadow side with a white board. Switch off every other light, sit well away from the wall, set the camera’s white balance to the light’s kelvin and the shutter to 1/60 (1/50 on 50Hz power).
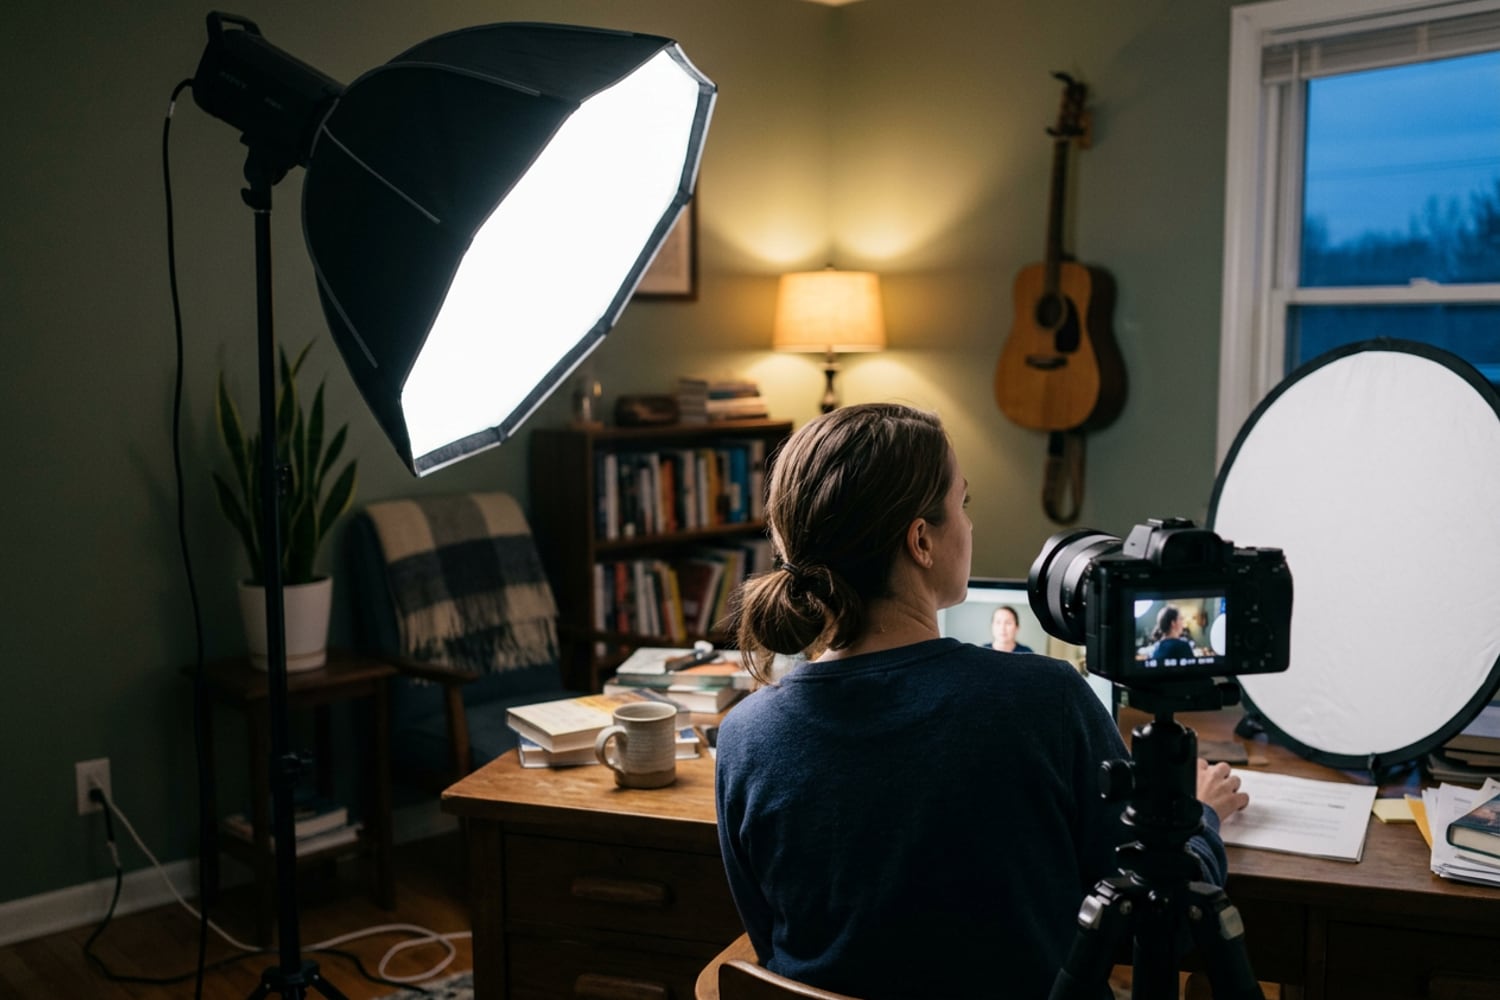
One light is enough for a talking-head video, as long as it is soft and in the right place. Most bad home footage isn’t short of light. It has the wrong light: a ceiling bulb straight overhead, a window behind you, a desk lamp drawing a hard shadow on the wall. This setup replaces all of that with one soft key light to the side of the camera and a white bounce opposite it. It fits a spare room or a bedroom corner, and every bigger setup is built on it.
What you need for a one-light setup
A back light and a second panel can wait. You need four things:
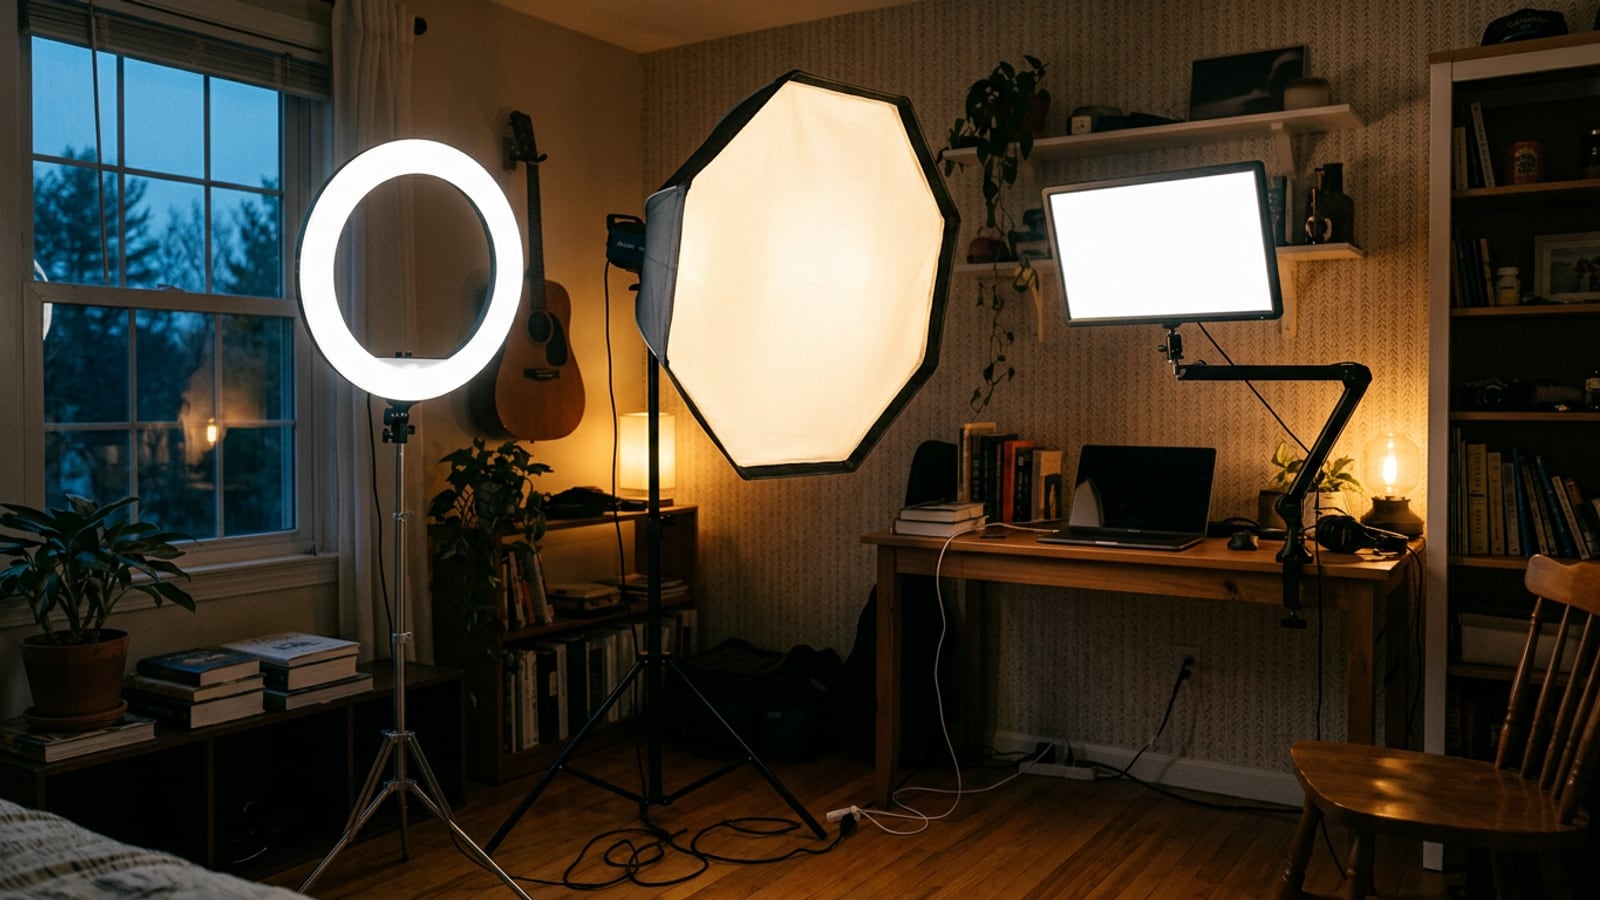
- One light with a soft front. An LED with a softbox, or a panel with a diffusion cover. A COB light with a Bowens mount, the common softbox fitting, takes a wide choice of parabolic and octagonal softboxes; one 2 to 3 feet across is a useful size for one person. At a desk, a clamp-on LED panel does the same job without a stand: ring light vs softbox vs LED panel compares the three.
- A light stand that reaches a foot or so above your head in the position you film in. An ordinary aluminum light stand is enough, with a sandbag on the legs if the softbox is large.
- Something white for fill. A collapsible reflector with a white side, or a sheet of white foam board.
- A room you can control. Curtains you can close, and overhead lights you can switch off.
The Kit carries each piece: COB lights with a Bowens mount, octagonal softboxes, an 8-ft light stand and a 30-inch 5-in-1 reflector, with a cheaper option in every group.
Clear the room first
Before the new light goes on, take away the light that fights it. Switch off the ceiling light: from straight above, it fills your eye sockets with shadow and lights the top of your head more than your face. If a window is behind you, close the curtains or turn the setup around, because the camera will expose for the bright window and leave your face dark.
A window beside you is different. On a bright day it can be your one light. But it changes with the clouds and the hour, and so does its color: daylight sits around 5500 to 6000K and an overcast sky nearer 6500K. An LED is the same at every take. If the window is the light you have, how to use window light for video covers where to sit and what to do about the sun.
Place the key light
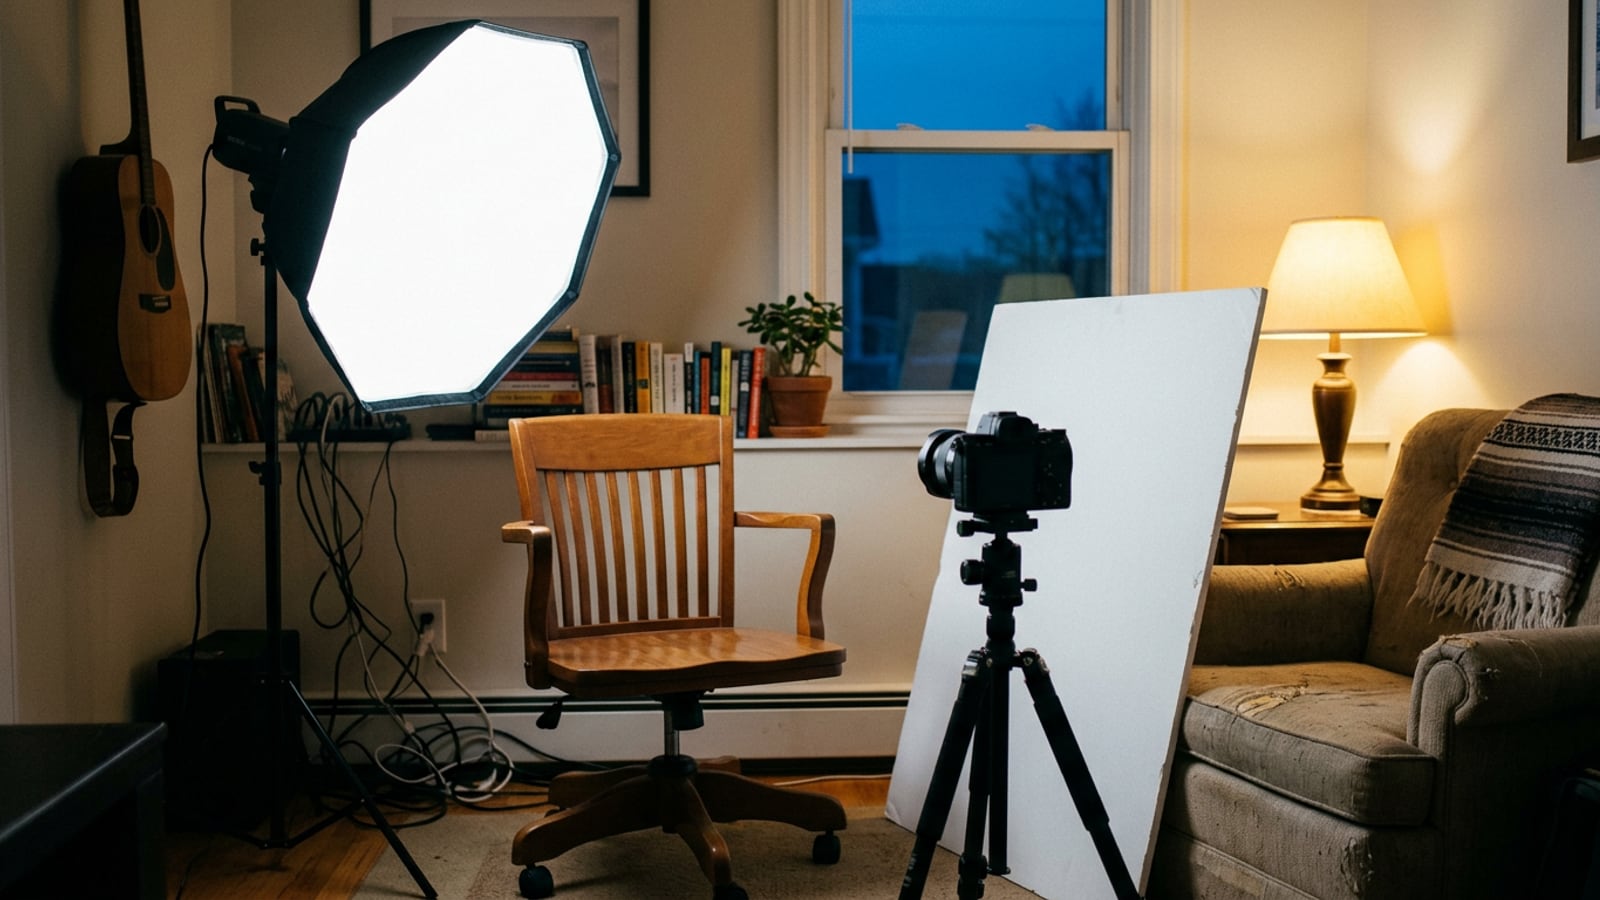
The light you add is the key: the main light, the one that sets the look. Start with it about 45 degrees to one side of the camera, so it lights the front of your face and lets the far cheek fall a little into shadow. That shadow is what gives your face shape on a flat screen. Pick the side your face looks better from, or the side with room for a stand.
Height and angle
Raise the light until its center is 1 to 2 feet above your eyes, then tilt it down toward your face. Too low and it lights you from underneath; too high and your eyes go dark. On the camera’s screen, look for a small bright reflection of the softbox in each eye, the catchlight, in the upper part of the eye. If you can’t see one, lower the light until it appears.
Distance and softness
Softness comes from size. A light that is large compared with your face wraps around it with gentle shadow edges, and a small one draws hard lines. Moving it closer makes it larger from where you sit, and so softer. Start with the light 2 to 3 feet from your face at a desk, or 3 to 4 feet out in the room with the camera on a tripod, the front of the softbox just outside the frame.
Distance also sets how bright the background is. Light falls off with the square of the distance, so twice as far from the light gets a quarter of it (the inverse-square law). With the softbox close to you and the wall several times farther away, the wall drops darker with no extra kit.
The Light Planner’s desk setup with no window draws this layout from above, with the kit at three budgets.
Tip: switch the light off and on while you watch the camera’s screen. Whatever changes is what the light is doing. Whatever stays the same is the room: fix that next.
Fill the shadow side with a bounce
With the key alone, the far side of your face may go darker than you want. You don’t need a second light to fix it. Put the white reflector or foam board on the other side of the camera from the key, at about face height, angled so it catches the key and sends it back into the shadow. Move it closer for more fill and farther away for less.
Keep the fill weaker than the key. Fill is usually softer and less bright than the key, up to about half as bright, and that difference keeps the shape in your face. A silver surface bounces more than white and can look harsh up close, so start with white. Pale walls in a small room may already do this job, so look before you add the board.
Get off the wall
One light can’t give you a back light, the rim from behind that separates you from the background. Distance does most of that job instead. Pull your chair forward, 4 to 6 feet from the wall if the room allows and 3 feet at the least, so your shadow falls on the floor rather than on the wall behind your head, and the wall goes a step darker than your face.
A practical, a lamp you already own placed in the background of the shot, adds depth too. Keep it dim enough that it reads as a glow, not a second key. More on backgrounds in Home Studio.
Match the camera to the light
Once the light is right, lock the camera to it so it stops adjusting between takes. Automatic settings chase every change, and a face that shifts color mid-sentence looks worse than one a touch too dark.
- Set the light’s color temperature first: 5600K if any daylight reaches you. With the curtains closed, any setting works as long as the camera matches it; a warmer 4500K keeps a warm lamp in the background from looking quite so orange.
- Set the camera’s white balance to the same number in kelvin, rather than auto.
- Set the shutter to 1/60 at 24 or 30 fps, or 1/120 at 60. In the US, where mains power runs at 60Hz, that also keeps mains-powered lights from flickering on camera. On 50Hz power, as in the UK and most of Europe, use 1/50 or 1/100.
- Keep ISO as low as the light allows, set the exposure on your face rather than the background, and lock it.
If something still looks wrong, start here:
| What you see | Why it happens | The fix |
|---|---|---|
| Dark eye sockets | Key too high, or a ceiling light on | Lower the key until catchlights appear |
| Your shadow on the wall | You sit too close to the wall | Move your chair forward |
| Glare in your glasses | The key reflects into the lens | Raise the key and move it farther aside |
| One side of your face too dark | No fill, or the key too far aside | Add the bounce, or bring the key in |
| Two colors on your skin | Daylight or bulbs mixing with the LED | Close the curtains, or match the window |
If you wear glasses, how to avoid glare on glasses on camera gives the heights and angles that keep the key out of your lenses.
When this setup works, a second light becomes a choice rather than a fix: a back light for separation, or a soft fill in place of the board. Three-point lighting at home shows where each one goes, and the Light Planner draws a setup for your own room and budget. More on lights and how to place them in Lighting.
Questions
Is a ring light a good single light?
It works, but it lights you from straight on, because it sits around the lens. That gives few shadows and little shape, and it puts a ring in each eye and in any glasses. A softbox 45 degrees to the side gives your face more shape for the same effort.
Can I use a window as my one light?
Yes, if it is beside you rather than behind you. Sit at an angle to it, put a white board on the other side for fill, and expect it to change with the clouds and the hour. For a video you film in more than one sitting, an LED is easier to match from take to take.
How bright does the light need to be?
Bright enough that your face is well exposed at or near your camera’s lowest ISO, with the shutter at 1/60 (1/50 on 50Hz power). A softbox takes some output away, and moving the light closer gives a lot back, so a light that looks weak at 6 feet may be plenty at 2.
Sources
- Three-point lighting, Wikipedia
- Inverse-square law, Wikipedia
- Color temperature, Wikipedia