How to take a YouTube thumbnail photo of yourself
Light and frame a sharp photo of your face that still reads at phone size, against a background that cuts out cleanly, then size and export it as YouTube asks.

Chapters
In short
Shoot the thumbnail as a still on purpose: face a window or a large soft light, put a white reflector below your face, sit several feet in front of a plain wall, and use the phone’s main camera on a tripod with the timer and with focus and exposure locked on your face. Leave room on one side for words, export a 16:9 JPG or PNG within YouTube’s limits (3840 by 2160 pixels recommended, under 2 MB from a phone), and look at it at phone size before you upload.
The best thumbnail photo of yourself is a still you take on purpose, not a frame grabbed from the video. Face a window or a large soft light, put something white below your face, sit well in front of a plain wall, and shoot on the phone’s main camera from a tripod, with focus and exposure locked on your face. Frame it wide for 16:9 with room for words, export it to YouTube’s size, and check it at the size a phone shows it: a couple of inches across. This guide is about the photo. The design comes after it, and nothing here can promise you clicks.
Light your face for a picture seen small
At thumbnail size, a face reads by its eyes and its outline. The shadow side that gives your face shape in a video becomes a dark patch two inches across, so light a thumbnail brighter and more evenly than you would light a talking-head video.
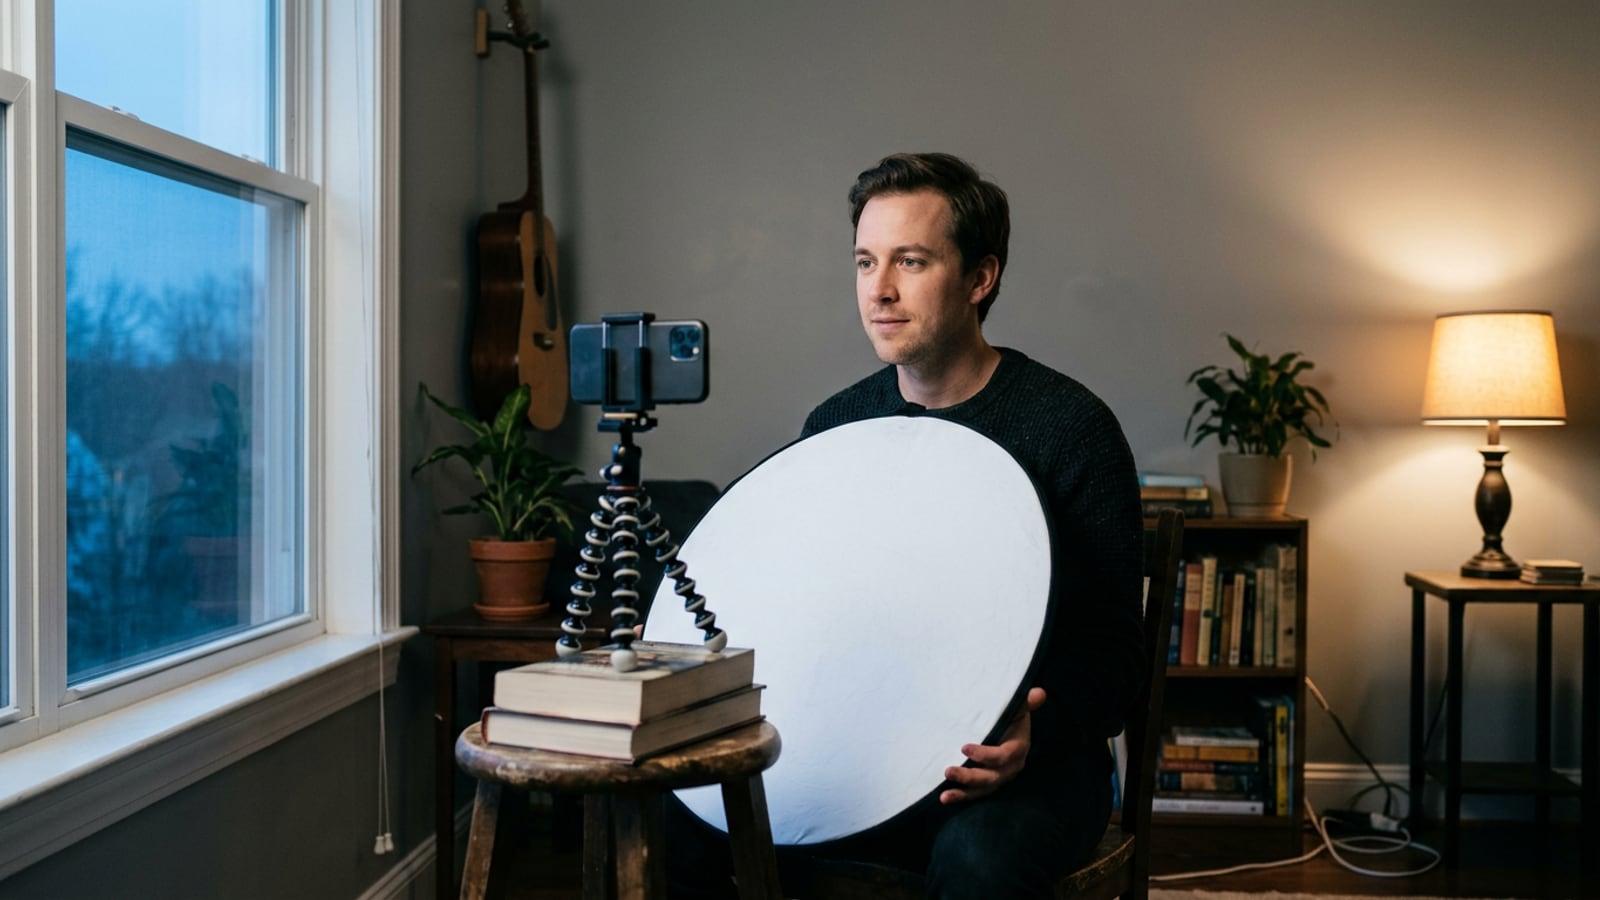
- Face the light. A window in front of you, behind the camera, puts big, soft light on both sides of your face and a large catchlight in each eye. It’s the Light Planner’s desk setup with the window in front of you, and the guide to window light for video covers direct sun, clouds and the time of day.
- Or bring the key round to the front. With an LED and a softbox, put it just above the camera and a little to one side, closer to the lens than the 45 degrees you’d use for video, so both eyes catch it.
- Put white below your face. A white reflector or a foam board at chest height, tilted up, fills the shadows under your eyes and chin. The 5-in-1 reflector on the Kit has a white side for this.
- Keep one color of light on your face. Switch off the ceiling light and any lamp that reaches you: mixed with daylight, a warm bulb turns one side of your face orange and the other blue.
If you wear glasses, the light that suits a thumbnail best, straight in front of you, is also the one most likely to show in the lenses. Keeping glare off glasses has the fixes, starting with tilting the frames down a little.
A background that cuts out cleanly
Many thumbnails put your face on a new background or next to an object, so the photo needs an edge your editing app can find. Background-removal tools do best when your outline is sharp and looks nothing like what’s behind it.
- A plain wall or a backdrop. A painted wall, a roll of seamless paper or a fabric backdrop; the Kit has both of the last two.
- A color unlike your hair, skin and clothes. Mid-gray suits most people. Dark hair against a dark wall, or a white shirt against a white one, is where the cut-out fails.
- Distance from it. Sit 4 to 6 ft in front of the wall, so your shadow lands on the floor, not behind your head.
- A back light, if you have one. Placed behind you on the side away from the key, it draws a bright edge on your hair and shoulders that separates them from the wall.
- Tidy flyaway hair. Single strands are the hardest thing for any tool to cut out.
The same things help if you keep the real background: a plain, darker wall behind a bright face reads at any size.
Frame for 16:9 and leave room for words
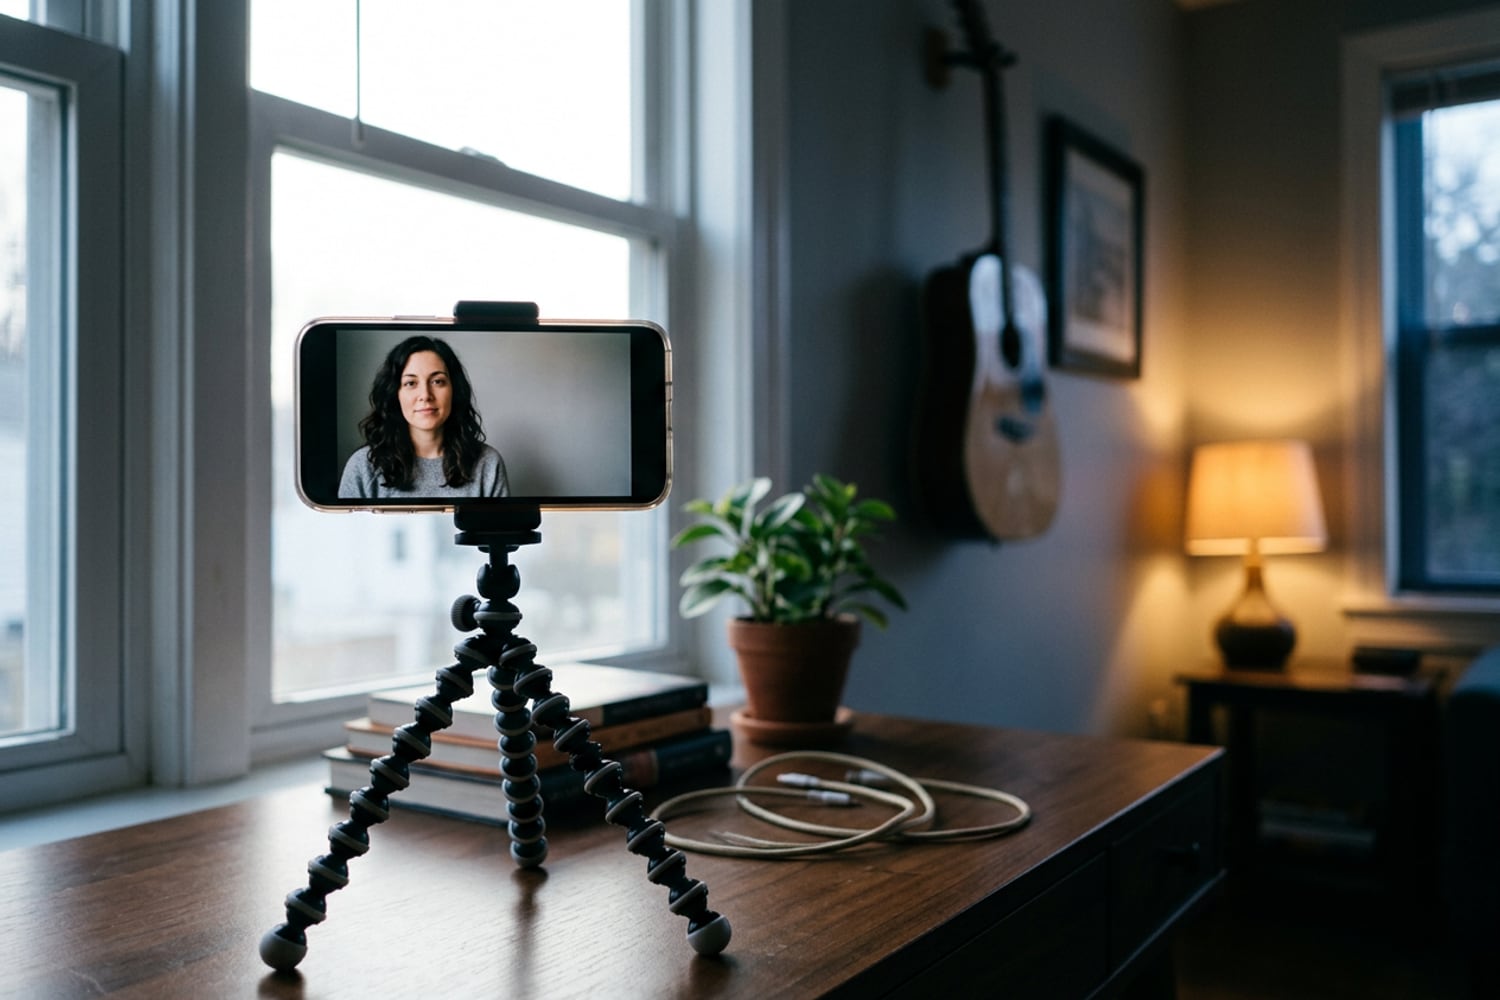
- Turn the phone sideways. On an iPhone, set the aspect ratio to 16:9 to see the thumbnail’s shape, or shoot 4:3 to leave room to reframe. Turn on the grid as well.
- Put the camera at eye level, a few feet away, on the main (1x) lens or the 2x. The ultra-wide lens up close stretches the middle of your face.
- Frame head and shoulders, with your face about a third of the way in from one side and the other side left for the words.
- Leave a margin around you. It’s easy to crop later, and impossible to put back the top of your head or a hand.
- Keep the bottom-right corner clear. That’s where YouTube puts the video’s length, over your picture.
Phone or camera settings for a still
On a phone
- Use the rear main camera. On most phones it has a larger sensor and a better lens than the selfie camera. Put the phone on a tripod or a clamp, and use the timer or a Bluetooth shutter remote so your hand isn’t in the shot.
- Lock focus and exposure on your face. Sit in place, and have someone help or reach the screen. On an iPhone, touch and hold the focus area on your face until AE/AF Lock appears, then drag the sun icon beside it down a little if your skin looks too bright. On a Pixel, tap your face, then tap Lock. Apple’s guide to the camera tools covers the iPhone’s lock, timer (3, 5 or 10 seconds), aspect ratio and grid; the Pixel Camera help covers tapping to focus and Lock on a Pixel.
- Flash off, zoom off. Move the phone instead of zooming in.
- Portrait mode, which blurs the background, helps separation, but check the edges of your hair, which it can smear.
On a camera
- Aperture f/4 to f/5.6, so both eyes and the tip of your nose are sharp.
- Shutter 1/125 or faster in window light, to freeze small movements. Under LED lights, if dark bands run across the picture, slow it to 1/60 (1/50 on 50Hz power).
- ISO as low as the light allows.
- Focus on the eye nearest the camera, with eye-detection autofocus if the camera has it.
- White balance set by hand to the light: 5600K for daylight and daylight LEDs.
Expression and eyes
Take a lot of frames. Set the timer, change your expression a little each time, and keep going after the first one that looks right: someone always blinks.
- Make the face match the video. If the video is calm and practical, a forced look of shock says something else. YouTube’s thumbnails policy also rules out a thumbnail that misleads viewers into expecting something that isn’t in the video.
- Choose where you look. Into the lens reads as looking at the viewer; looking at an object or toward the space for words points the viewer there.
- Find the catchlights. Zoom into the eyes on the phone’s screen. If there’s no bright spot of light in each, bring the light round to the front or a little higher.
- Bring your chin slightly forward and down. It’s the standard portrait tip for a clean jawline.
Size, format and file limits
YouTube’s help page on custom thumbnails gives these figures, as of October 2026:
| What | YouTube’s figure |
|---|---|
| Recommended size | 3840 x 2160 pixels |
| Aspect ratio | 16:9 (9:16 for Shorts) |
| Minimum width | 640 pixels |
| Format | JPG or PNG |
| File size from a phone | Under 2 MB |
| File size from a computer | Under 50 MB |
| Who can upload one | Verified accounts |
To get there:
- Crop the photo to 16:9 in your editor.
- Resize it to 3840 by 2160. A 12-megapixel phone photo is 4,032 pixels wide, enough to crop to 16:9 and still fill that size.
- Export it as a JPG. If it comes out over 2 MB and you’re uploading from a phone, lower the JPG quality a step or upload from a computer.
- In YouTube Studio, open the video’s details and upload the file under Thumbnail. It can take a while to appear on YouTube.
Check it at phone size before you upload
In a phone’s feed your thumbnail is a couple of inches wide, so look at it that way before you commit.
- Send it to your phone, or zoom out on the computer until it’s the size of a thumbnail in a feed.
- Ask three questions: can you see your eyes and your expression, is the outline of your head clear against the background, and do the words read?
- Put it next to the thumbnails already on a search page for your topic, in both light and dark mode.
- Check the bottom-right corner, where the video length will cover it.
When it doesn’t read, the fix is usually in the photo: frame tighter, put more light on your face, or make the background plainer and darker. More words rarely help. For titles, retention and the rest of getting a video watched, see Channel Growth.
Questions
Can I use a frame from my video as the thumbnail?
You can, and YouTube Studio will also suggest thumbnails of its own. A still taken on purpose usually looks better: video is shot at a shutter speed slow enough to blur anything that moves, faces caught mid-word are rarely flattering, and a 1080p frame is half the width YouTube recommends. If you do use a frame, take it from 4K footage at a moment you were holding still.
What size should a YouTube thumbnail be?
YouTube’s help page recommends 3840 by 2160 pixels at 16:9, with a minimum width of 640 pixels, uploaded as a JPG or PNG. The file must be under 2 MB if you upload from a phone and under 50 MB from a computer. These figures have changed before, so check the page when you upload.
Should I look into the lens in a thumbnail?
Often, yes: looking into the lens reads as looking at the viewer, which suits a video where you talk to camera. Looking at the thing the video is about, a product or the words on the thumbnail, sends the viewer’s eye there instead. There’s no rule, so choose the one that says what the video is.
Why can’t I upload a custom thumbnail?
Custom thumbnails need a verified account, which you set up at youtube.com/verify with a phone number. If the account is verified, check that the file is a JPG or PNG under the size limit, and that you haven’t hit the daily limit on custom thumbnails. Community Guidelines strikes also reduce how many you can upload, and repeated thumbnail violations can remove the feature for 30 days.
Sources
- Add custom thumbnails on YouTube, YouTube Help
- Thumbnails policy, YouTube Help
- Use iPhone camera tools to set up your shot, Apple Support
- Take high quality photos on your Pixel phone or tablet, Pixel Camera Help