YouTube studio setup for a small room: a checklist
A checklist for a filming spot in a room under 10 by 10 ft: the spot, the wall gap, light, sound, camera, background and cables, then a five-minute setup.
Chapters
In short
Film along the room’s longest line, into a corner, sitting at least 3 feet from the wall behind you, and set the light before you touch the sound, the camera or the background. Then put the lens at eye level, dress only what the frame sees, keep power strips uncrowded and cords out from under rugs, and store everything so it comes out in five minutes.
A small room becomes a studio when you set it up in this order: the spot, the distance from the wall, the light, the sound, the camera, the background and the cables. Each step depends on the one before it, so doing them out of order means doing them twice. In a room under 10 by 10 feet the thing to find is depth: film along the room’s longest line, sit at least 3 feet off the wall behind you, and light yourself rather than the room. Here is the checklist, with the measurements, and a five-minute routine for a room that is also a bedroom.
Choose the spot
Pick where you sit before you buy or move anything:
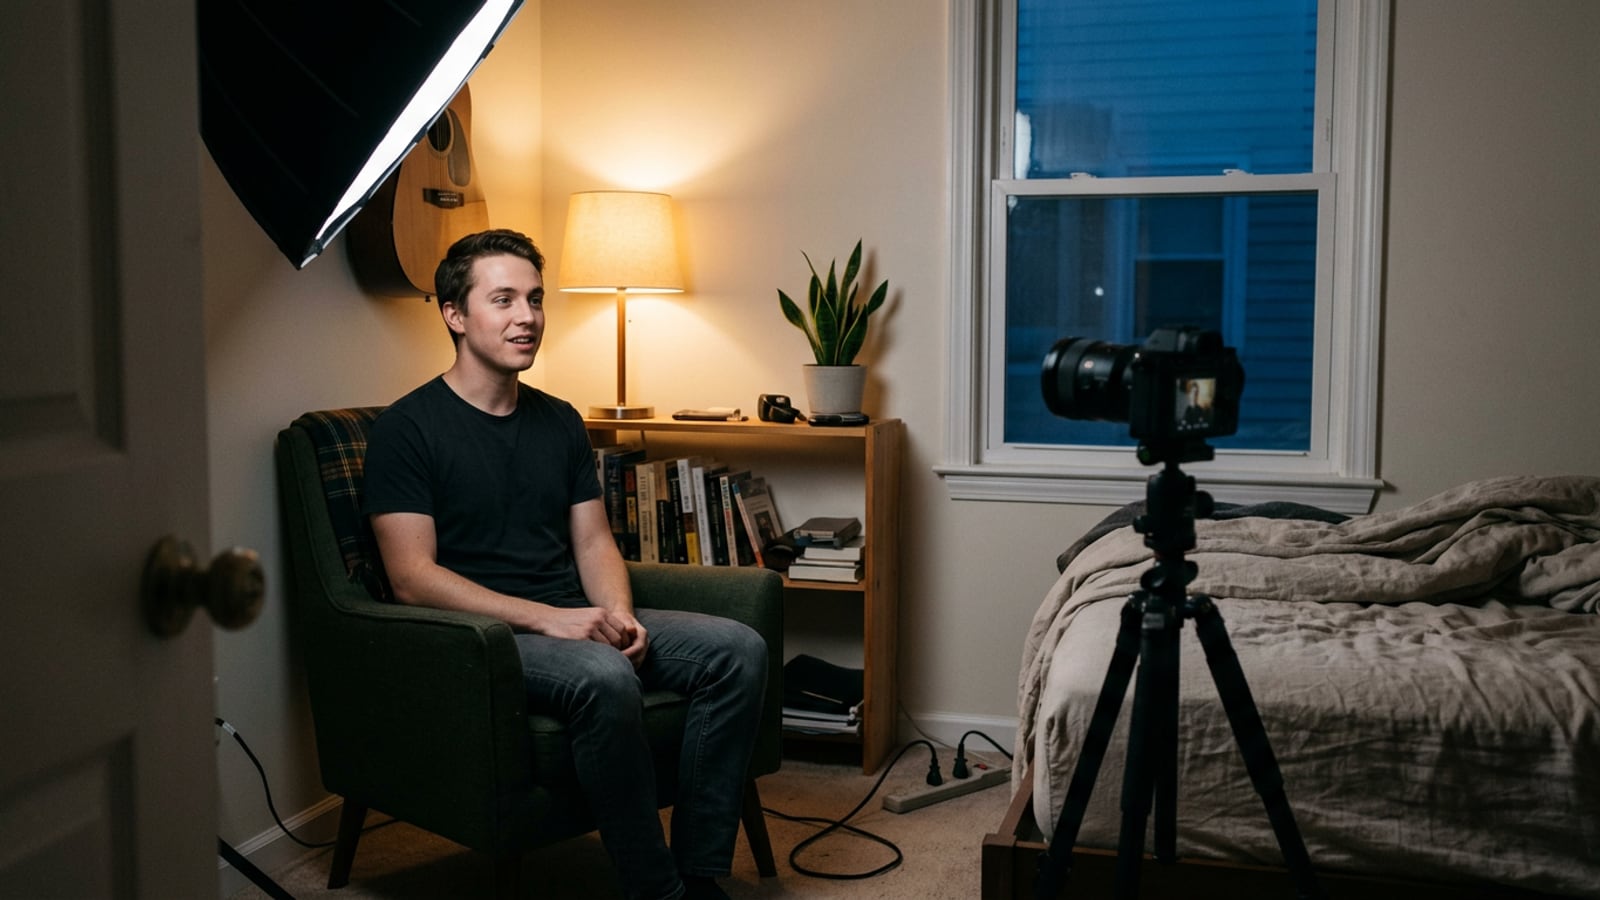
- Film along the longest line in the room. In a square room that is the diagonal: corner to corner, a 10-by-10-ft room is about 14 feet, against 10 along a wall. Sitting with a corner behind you also gives the background two walls that angle away, which reads as depth on camera.
- Put the window beside you or in front of you, never behind you. A window behind you turns you into a silhouette.
- Keep away from the door and the noisy wall, the one on the street or shared with a neighbor, and from the air vent.
- Sit near an outlet, so no cord crosses the way in and out of the room.
- Choose a spot you can leave marked, so setting up again means putting things back on their marks.
At a desk, the desk is the spot. Check the wall behind your chair instead.
Get off the wall
Sit 4 to 6 feet from the wall behind you if the room allows, and 3 feet at the least. Distance does two jobs at once: your shadow falls on the floor rather than on the wall, and the wall gets less of the key light, so it drops darker than your face and you stand out from it.
Measure the line before you set anything up. Out in the room you need about 8 to 10 feet: 3 or more from the wall to you, then 4 to 6 from you to a camera on a tripod. If even the diagonal can’t give you that, film at a desk with the camera on the monitor, 2 to 3 feet from you. The Light Planner’s adjustments for your room cover small rooms, low ceilings and white, dark or colored walls.
Light it before anything else
The light decides what the camera, the background and even the spot look like, so set it now:
- Switch off the ceiling light. From straight overhead it lights the top of your head and leaves your eyes in shadow.
- Place a soft key light about 45 degrees to one side of the camera, 3 to 4 feet from you (2 to 3 at a desk), its center 1 to 2 feet above your eyes. In a small room a 24-inch softbox or a desk key light fits where a big softbox won’t.
- Let the walls fill. White or pale walls bounce the key back onto your shadow side for free. If your face looks flat, hang something dark on the side away from the key to bring the shadow back.
- Add a back light only if there’s room. With no space for a stand behind you, clamp a small LED panel to a shelf or the top of a door frame, high and to the side, with a clamp rated for its weight.
By day, a window beside you can be the key. Where each of the three lights goes in a small room, and which to leave out, is in three-point lighting at home.
Quiet the room
A small room with bare walls makes your voice ring, and a bedroom has an advantage here: the bed, the curtains, a rug and a closet of clothes all soak up sound.
- Put the mic close. A mic a few inches from your mouth hears far more of you than of the room, which does more than any treatment. A boom arm such as the RØDE PSA1+ on the Kit page holds it close and just out of frame.
- Shut out the noise. Close the window and the door, switch off fans and, if you can, the heating or cooling during takes, and put your phone on Do Not Disturb. If your light has a quiet fan mode, use it.
- Add panels last, and only where a test recording still rings. Fabric-wrapped panels 2 or 4 inches thick, such as the ATS Acoustics panels in the Kit, go on the bare walls nearest the mic.
Echo and noise need different fixes; how to reduce echo in a room separates the two and shows how to test the room with a ten-second recording.
Put the camera at eye level
- Lens at the height of your eyes. Seated, that is about 4 feet from the floor. A camera below your eyes looks up your nose; above them, it looks down on you.
- The right distance: 2 to 3 feet at a desk, 4 to 6 feet on a tripod in the room.
- The right mount: a webcam on the monitor, with the monitor raised until the lens meets your eyes; a phone in a clamp on a tripod; a camera on a tripod with its screen turned toward you.
- Frame with your eyes about a third of the way down from the top of the picture, and a little space above your head.
Which camera to put there, and what each needs to connect, is in webcam vs phone vs camera for YouTube.
Dress the background
Only what the lens sees needs to look finished, so dress it with the camera’s screen in front of you:
- Build depth. Two or three things at different distances, such as a shelf, a plant and a lamp, read as a room; one flat wall reads as a wall.
- Add a practical. A lamp with a warm bulb, about 2700K, a little darker than your face, gives the background a glow without competing with you.
- Add color last. An RGB tube light washing the wall behind you separates you from it, once the key is right.
- Take out what reflects. A mirror, a framed print behind glass or a glossy poster can catch the key light, or the camera itself.
- Cover what can’t be fixed. The Westcott X-Drop Pro on the Kit page is an 8-by-8-ft fabric backdrop in gray, white, black or chroma-key green, with its stand, and packs into a 34-inch case; seamless paper on a roll is the cheaper way.
A green screen is the hard way in a small room: a chroma key needs even light across the screen and distance between you and it, which a small room seldom has.
Cables, power and storage
Plugging in is the whole job here: anything beyond it, such as a new outlet or a light wired into the ceiling, is an electrician’s job.
- Plug the power strip straight into a wall outlet, never into another strip or an extension cord.
- Use a strip with built-in overload protection, and don’t overload it. Add up the watts on each light’s adapter and check them against the strip’s rating.
- Keep cords out from under rugs and carpets, where they can be pinched and can’t shed their heat, and replace any cord that is worn or damaged. The U.S. Fire Administration’s electrical safety tips and the CPSC on extension cords cover the rest.
- Keep fabric away from lights. Curtains, bedding and clothes stay clear of any light that runs warm and of its fan vents, and only diffusion made for the light goes over its front.
- Weigh down the stands. A softbox makes a stand top-heavy; hang a sandbag on one leg.
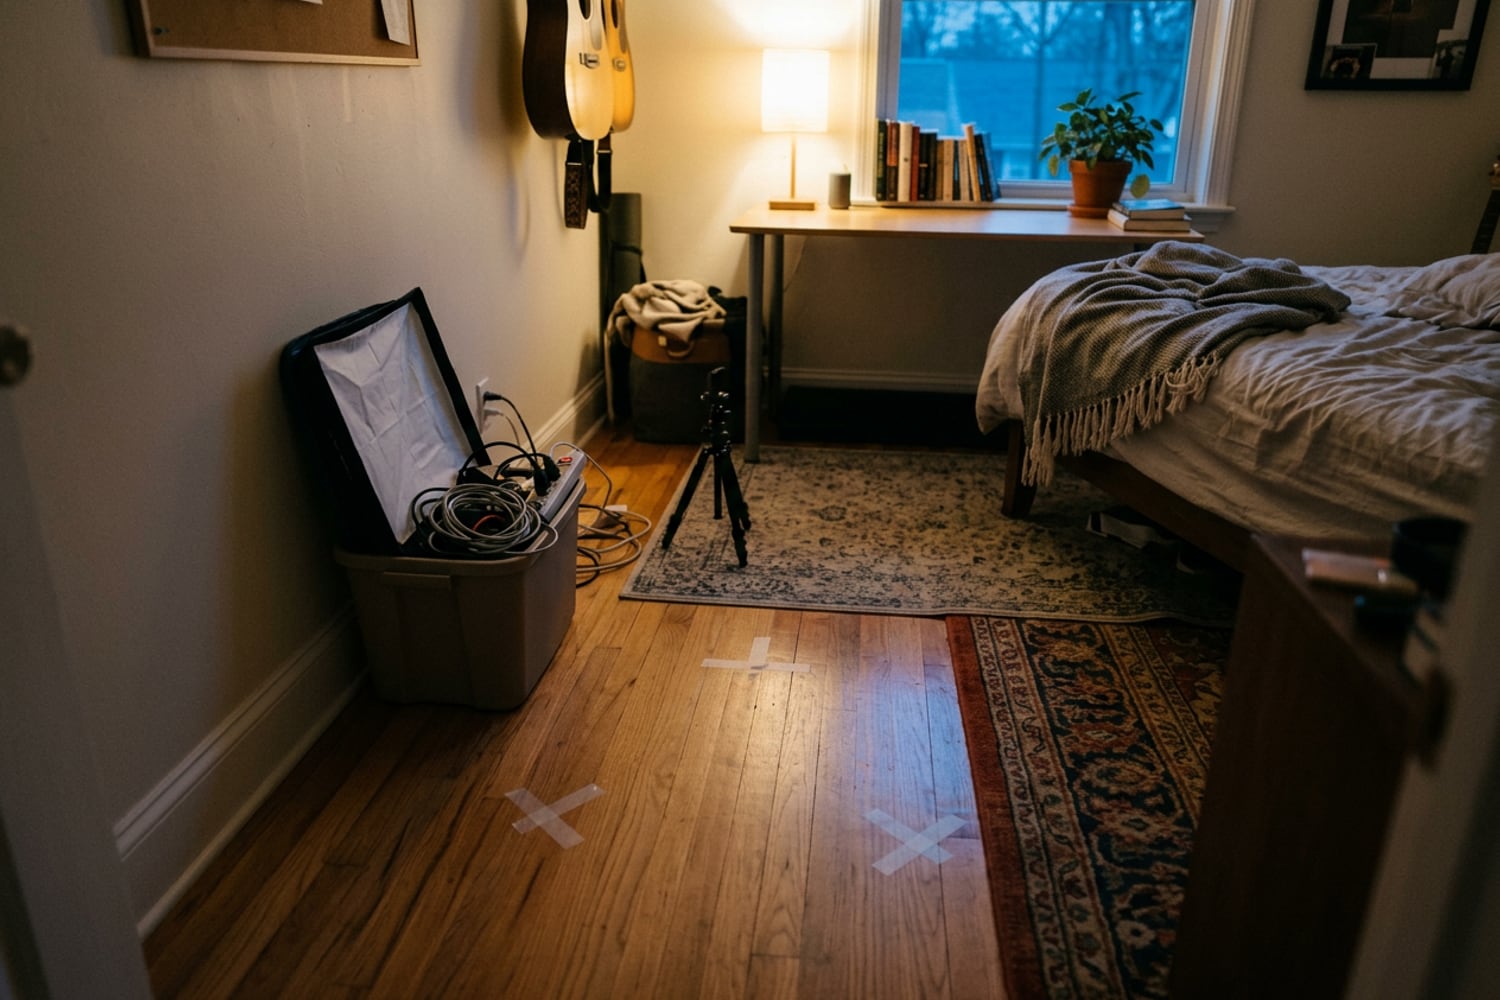
- Tape the cords that cross the floor with gaffer tape, which comes off cleanly, and run the rest along the walls.
- Give the kit one home. A shelf or a bin by the spot, with the stands folded against the wall next to it.
The five-minute setup routine
When the room is also where you sleep, the studio has to come out and go away quickly. Mark it once: small tape marks on the floor for the chair, the tripod legs and the light stand, and a strip of tape on each stand’s riser at its working height.
Tip: set the camera’s white balance, shutter and frame rate once and leave them, or save them as a custom setting, so setup is moving things to their marks rather than setting anything again.
To set up:
- Chair on its mark, curtains where you film with them, ceiling light off.
- Light stand on its floor mark and raised to its tape, softbox on, the key at the same brightness and kelvin as last time.
- Reflector or fill on its side, then the back light and the practical lamp.
- Tripod on its marks, camera on, lens at eye level; check that exposure and white balance are where you left them.
- Mic swung in on its arm. Record ten seconds, play it back for picture and sound, and start.
To pack away:
- Lights off; let them cool before you fold anything.
- Softbox folded or left on the light, stands lowered and stood against the wall.
- Cords coiled into the bin, power strip switched off.
- Tripod folded at its height, backdrop rolled or folded into its case.
For the light in your own room, the Light Planner draws a setup from its size, its window and your budget. More on rooms, backdrops and desks in Home Studio.
Questions
How much space do I need for a YouTube studio?
Less than most people think. At a desk, the desk and 3 feet behind your chair are enough for a webcam or a phone 2 to 3 feet from you. Out in the room, plan on a strip about 8 to 10 feet long, at least 3 feet from the wall to you and 4 to 6 feet from you to the camera, and about 6 feet wide for a key light on one side and a reflector on the other.
What makes a good background in a small room?
Depth, a little light and not much else. Film into a corner or along the diagonal so the background is as far away as the room allows, put two or three things at different distances from the lens, such as a shelf, a plant and a lamp, and keep the wall a little darker than your face. A warm lamp in the frame, dimmer than you, does more than a wall full of objects.
Is a green screen worth it in a small room?
Rarely. A green screen needs even light across the whole screen, with no shadows or wrinkles, and distance between you and it so the green doesn’t bounce back onto your skin and hair, and a 10-by-10-ft room seldom has space for both. A real background with a lamp in it, or a plain gray backdrop, is easier to light and won’t fray at your edges. If you do key, use a matte, wrinkle-free screen, light it with its own lights and sit as far in front of it as the room allows.
How do I film in a bedroom without it looking like one?
Keep the bed out of the frame: put it behind the camera or to one side, and film toward the most finished wall or corner. Dress only what the lens sees, add a lamp and one or two objects at different depths, and let the rest of the room fall darker than you. If no wall works, a fabric or paper backdrop a few feet behind you covers the room in one move.
Sources
- Appliance and Electrical Fire Safety, U.S. Fire Administration
- Limit Extension Cords To Reduce Risk Of Fire, U.S. Consumer Product Safety Commission
- Chroma key, Wikipedia