Microphone Plug Types Explained: A Complete Guide
Microphone plug types help you match a mic to your phone, camera, or recorder. Compare XLR, USB-C, and signal needs to buy the right connector first time.

Chapters
In short
Microphone plug types are the connectors that carry audio from a microphone to a phone, computer, camera, or recorder. Match the plug and wiring to the device and signal path: XLR usually needs an interface or mixer, USB connects directly, and 3.5 mm TRS and TRRS plugs serve different purposes; balanced XLR is better for long, noise-resistant runs. Check your gear’s jacks and power needs before buying, since a plug that fits can still produce weak, distorted, or no sound.
Ever bought a charger that looked right, only to find the end didn’t fit your phone? Microphones run into the same snag.
Plug types are the connectors that link a mic to your camera, phone, or recorder, and the wrong one leaves you with silence or a drawer full of adapters you didn’t need.
In this post, we’ll walk through every common plug type, from classic XLR connectors to USB-C, explain what each one does, and show which one fits your setup. By the end, you’ll know exactly what to buy so you get it right the first time.
Microphone Plug Types and Connectors
The plug decides what your mic can connect to, so here’s how we’ll sort the main types.
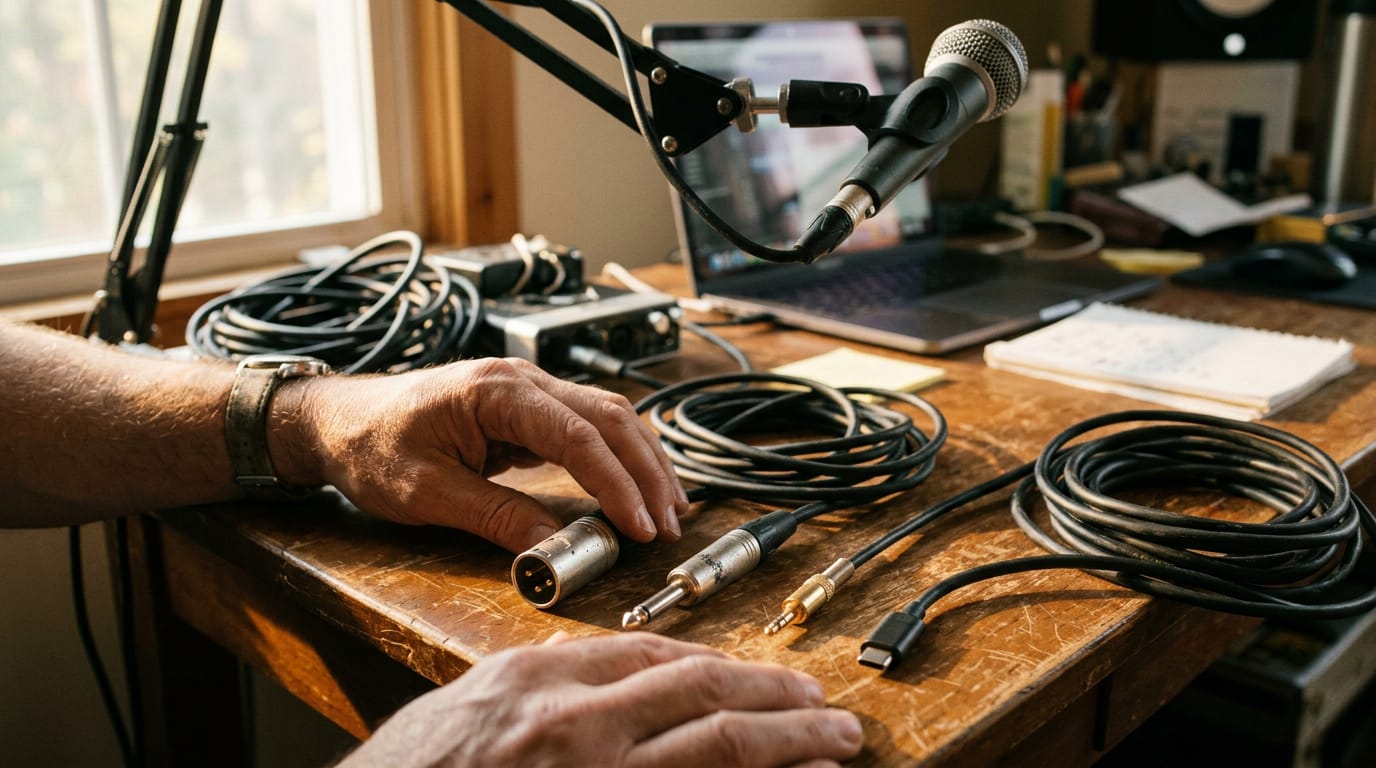
The three-pin XLR plug for pro mics
The XLR is the three-pin, balanced connector on most pro mics, and what it plugs into matters as much as the plug itself.
- Male and female ends. Mics have male outputs, so you’ll need a female-to-male cable.
- Pro audio and lighting. XLR also runs stage lighting gear.
- XLR-4 and XLR-5. These add pins for specialized gear.
- Locking and mini-XLR. Locking plugs latch in place, and mini-XLR is a smaller version used on some wireless bodypacks.
- Needs an interface or mixer. An XLR mic won’t plug into a phone or laptop on its own, so you’ll need an audio interface or mixer.
Quarter-inch jacks for instruments and studio gear
The quarter-inch jack is the big round plug on instruments and studio gear, used for instrument and patch cables in both studio and live rigs. A TS plug (tip-sleeve) is unbalanced, while a TRS plug (tip-ring-sleeve) is balanced.
You may also hear it called a Klinke or phone plug.
Telling apart 3.5 mm and 2.5 mm plugs
Phone, laptop, and console jacks look alike at 3.5 mm, but how many rings a plug has decides its job. A TRS plug carries audio only, for headphones or line out. A TRRS plug (tip, ring, ring, sleeve) adds a second ring, and that extra ring carries the mic.
The 2.5 mm version is smaller and mostly found on older devices.
- Headsets and lav (clip-on) mics. Many use TRRS. Wireless types are lavalier, headset, or handheld, and each receiver’s output (often XLR, 3.5 mm, or USB) sets which plug you need.
- Splitters and adapters. A streamer whose headset gets no mic on a laptop’s combined jack can use a TRRS splitter to separate headphone and mic plugs, but check the pin layout first.
- Pink and green. Many computers color-code jacks: pink for mic, green for headphones or line out. So the mic plug is usually pink.
Connecting a mic over USB or USB-C
A type C microphone uses a USB-C plug, the reversible oval connector, and has its own converter built in, so no separate interface is needed. Plug it into a computer and it usually works with no extra gear.
Phone mic adapter checklist:
- Check your phone’s port: USB-C, Lightning, or 3.5 mm.
- Match the mic’s plug to that port, or add an adapter.
- Do a test recording before you film.
A course creator records lessons on her phone with a USB-C mic on a short cable. She plugs in, hits record, and skips the extra box on the desk.
Other audio connectors like RCA and Toslink
- RCA. Those red and white phono pairs on TVs and stereos are unbalanced analog links, fine for consumer gear but not for a mic.
- Toslink. This optical connector carries digital audio as light pulses, common on soundbars and TVs.
Both are mostly consumer audio-visual connectors, built for listening to a system, not recording a voice.
Microphone Types and Pickup Patterns
How a mic is built and where it listens from shape its sound before the plug ever matters.
Common mic designs and their sound
- Dynamic mics are rugged and handle loud sources, so a streamer who gets loud mid-match won’t need to back off.
- Large-diaphragm condensers bring out detail, which suits a quiet room.
- Small-diaphragm condensers respond well to transients, meaning quick sounds like a snap or a tap.
- Ribbon mics sound dark but are fragile, so handle them with care.
- Tube condensers add a character of their own, a coloration that’s part of the sound.
- USB (Universal Serial Bus) mics have the converter built in, so they plug straight into a computer.
Where a mic picks up sound from
The question is less about how loud a mic is and more about where it listens. A pickup pattern sets those directions:
- Cardioid is the most common, favoring sound from the front and rejecting much from behind.
- Supercardioid and hypercardioid are narrower, focusing on one source.
- Figure-8 picks up the front and back but rejects the sides.
- Omnidirectional mics pick up every direction, room included.
Most directional mics also share the proximity effect: close up, the low end gets a boost. Lean in, and the bass comes with you.
Ways to record stereo with mic pairs
Four common setups capture stereo with two mics:
- XY angles two mics together at one point for a tighter image.
- ORTF spaces two mics apart and angles them outward for a wider spread.
- AB places two mics parallel and apart, with the 3:1 rule guiding the spacing.
- Blumlein crosses two figure-8 mics at right angles.
A vlogger capturing room sound can use an ORTF pair for more natural space than a single mic, so viewers feel like they’re standing right there.
Balanced Versus Unbalanced Signals and Cable Length
Two things decide whether a cable keeps your audio clean: how the signal is built and how far it has to run. We’ll cover both, starting with the signal.
How balanced and unbalanced signals behave
A balanced signal sends two matching wires plus a ground reference. Interference hits both wires about equally, so the receiver subtracts one from the other and cancels most of the hum.
That’s the design behind the locking, three-pin XLR connector, the round plug common on professional microphones.
Most consumer jacks are unbalanced, with one signal wire and a ground. Nothing cancels noise, so whatever the cable picks up stays in your recording. Balanced cables cancel noise, while unbalanced cables just carry it along.
Longer runs give interference more chances to sneak in. A shielded cable’s grounded metal layer blocks much of it, but it can’t balance an unbalanced run. Shielding is a bonus, not a fix.
Picking the right length for your cable
Length limits depend on the signal type, so start with your route. A streamer whose mic sits a few feet from her computer needs a short cable, and extra length just tangles.
A podcaster with his mixer across the room needs a longer run, and balanced XLR is the one built to handle it.
- Desk runs: a few feet is plenty.
- Unbalanced cables: keep them to about 20 feet at most.
- XLR cables: balanced runs can stretch up to 100 meters.
- Match length to actual path: measure the route from mic to device, add a little slack, and stop there.
Measure once, buy once.
Getting Phantom Power to Your Mic
Some microphones need a little extra power to work, and others don’t. Here’s how to tell which is which before you plug anything in.
What condenser mics need to run
Condenser mics need phantom power, a 48-volt supply sent down the XLR cable to run the mic’s internal electronics.
According to Hybrid Microphone Preamplifier With Variable Selection Of Amplifier Technology, condenser microphones can receive 48V phantom power over an XLR connection.
Your interface or mixer supplies that power, so the switch lives on the device, not the mic. Some condensers skip phantom entirely and run on batteries or a dedicated tube power supply instead, so check the manual before you assume.
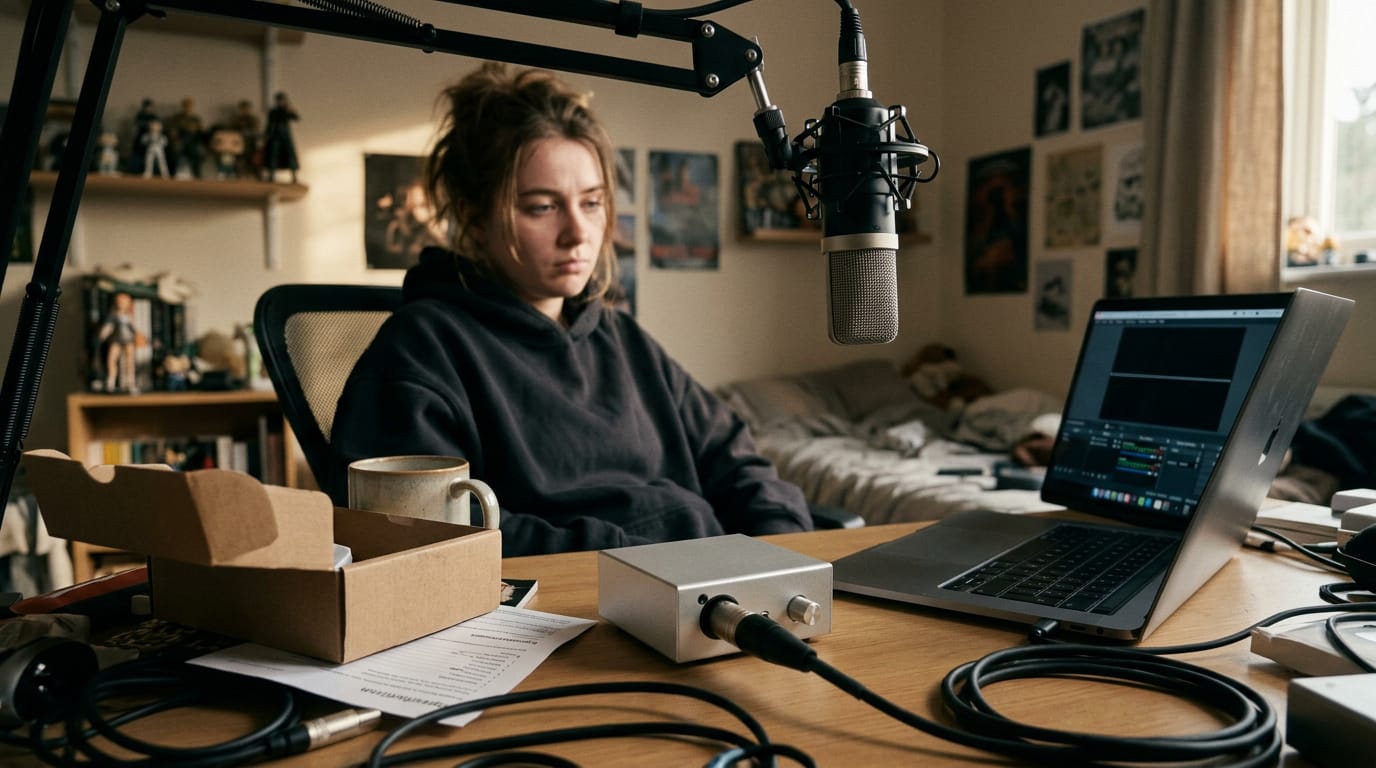
Before you buy, confirm your interface or mixer offers phantom power. Consider a streamer who plugs a new condenser into a basic audio box, hunts for a switch that isn’t there, and gets silence. A quick look at the specs would have saved her a return.
Dynamic and ribbon mics with phantom power
Dynamic mics don’t need phantom power, so you can leave it alone for them. Ribbon mics are the exception: phantom power can damage them, so they need the most caution.
Make it a habit: switch phantom off before you plug in or unplug any mic. Every time.
Choosing Between USB and XLR Setups
Your plug decides how a mic reaches your computer. Here are the two routes:
Running a single mic straight over USB
A USB (short for Universal Serial Bus) mic gives you one mic and one cable: plug it into a laptop and you’re recording, which makes it the easiest pick for solo podcasting.
The tradeoff is limited expansion and routing, so adding a second guest gets awkward fast. Phones and tablets also need enough power to run the mic, so check that first.
Using XLR mics with an audio interface
An XLR mic outputs analog audio, so it needs an audio interface: a box with a built-in preamp (the circuit that boosts a mic’s weak signal) that converts the sound to digital for your computer. The payoff is scale: one interface can run several XLR mics.
Picture a podcaster who starts solo, then brings on a co-host and adds a second XLR mic to a two-input interface. The catch is a higher upfront bill.
When adapters and mismatched plugs cause trouble
Mismatches are where trouble starts.
An XLR-to-3.5 mm adapter can connect a mic to a phone or laptop, but its level and impedance (the electrical resistance the signal pushes against) may not suit that input, which can leave sound weak, noisy, or distorted.
Every adapter is another failure point. Keep the chain short. Match the jack to the signal path, not just the plug that fits. TRS (tip, ring, sleeve) plugs have three contacts and TRRS plugs have four, so the wiring differs.
Mix them up and a mic can go silent or send its signal to the wrong pin. Mounting a mic on a camera’s hot shoe (the bracket on top of the body) follows the same rule, so confirm the connection matches first.
Mic Switches and Helpful Accessories
Before you buy extras, check what your mic and preamp (the circuit that boosts the signal) can already do. You’ll often find the fix is a switch away.
Switches on the mic and preamp
Pad lowers the incoming level before it reaches the preamp. Picture a podcaster who laughs right up against the mic: with the pad on, those loud peaks stay clean. The pad changes how loud the signal is, not how the voice sounds.
48V phantom power sends 48 volts down the cable to power condenser mics. Leave it off for dynamic mics, which don’t need it.
Low cut (also called a high-pass filter) trims low rumble like air conditioning or traffic. A streamer whose computer fan hums under every line can flip it on and skip the cleanup. The hum drops out.
Add-ons like pop filters and shockmounts
- Pop filter. A mesh screen between your mouth and the mic that softens the puffs of air from hard sounds like “p” and “b.”
- Shockmount. An elastic cradle that keeps desk bumps and footsteps out of the recording. A host who types at the same desk will pick up every thump without one.
- Windscreen. A foam or furry cover that cuts wind noise outdoors or near a fan.
- Cloudlifter or Fethead booster. An inline device that adds clean gain to a quiet dynamic mic, so you don’t have to push the preamp and bring in hiss. It needs phantom power.
- Stands and boom arms. A stand holds the mic at mouth height, and a boom arm swings it over the desk and out of the shot. For example, a course creator at a small desk swings the arm aside when she films a product.

Cable Quality and What You Should Pay
A cheap cable can crackle or snap at the worst moment. Here’s how to spot a sturdy one and what to spend.
What goes into a well-made cable
- Copper conductors. The wires that carry your audio from mic to recorder.
- Foil or braid shielding. This layer blocks the hum and buzz that sneak in near power cords.
- Jacket and braided sleeve. The outer layers protect the wires from being stepped on or dragged.
- Strain relief. The reinforced spot where the cable meets the plug, so the wires don’t pull loose.
- Nickel or gold plating. A coating on the contacts that resists tarnish and keeps the connection solid.
Matching your spend to how you record
- Match spend to usage. A cable that stays behind a desk needs less than one carried to every shoot.
- Mid-range for home studios. A solid mid-range cable covers a desk or single-room setup.
- Premium for touring. Cables that get rolled, dragged, and packed every week earn the extra toughness.
- A higher price isn’t the same as better sound. Past a solid build, extra cost usually buys durability or looks.
Consider a streamer whose mic sits on a boom arm and never moves. A mid-range cable clipped in place will hold up for years, so the real test is whether it can survive her setup, not just look premium.
Reading cable specs and reviews wisely
- Check both connector ends. Make sure each plug matches your mic, your recorder, and any adapter in between.
- Ignore marketing buzzwords. Terms like “pro-grade” are sales language. Ask what’s inside the jacket, not what’s printed on it. Build beats branding.
- Reviews as a sanity check. Look for patterns about durability and noise, not one loud opinion.
Buying Tips and Mistakes to Avoid
Most mic regrets start before the box arrives, so sort out your recording setup and jacks first.
Gear that fits how you record
- Podcasting and streaming. A podcaster recording in a converted closet can plug a USB (Universal Serial Bus) mic into a laptop and start talking within minutes.
- Vocal and project studio. Musicians usually go XLR (a three-pin connector) into an audio interface, a box that connects the mic to your computer.
- Mobile and travel recording. Check your phone or recorder’s jacks first, since each device takes different plugs.
- One mic for many jobs. An XLR mic moves between setups with the right adapter, while a USB mic stays put.
Choosing your mic one step at a time
- Identify jacks first. Look at the jacks on your camera, phone, or recorder. To plug in a mic, match its plug to one of those jacks, push it in until it sits snug, then connect the other end to your interface, recorder, or camera.
- Pick connector then type. Connector first, type second: settle the plug your device takes, and you’re halfway there. Then choose the mic style that suits your voice or instrument.
- Set budget tier. Choose a tier that covers adapters, stands, and cables, not just the mic.
- Compare reviews and accessories. Read reviews from people recording in rooms like yours, and check what’s in the box.
Mistakes that trip up new mic buyers
- No phantom power. Condenser mics, the sensitive studio type, need phantom power, a small supply sent down the cable from an interface or mixer. Without it, you’ll get little to no sound.
- XLR mic without interface. A streamer who buys an XLR mic for a laptop finds no XLR input, so the mic waits for an interface.
- Forgetting stands and cables. A missing stand or a cable too short for your desk can stall the whole setup.
- Plug and jack mismatch. A plug can fit a jack and still not work, so check the match before you buy an adapter.
- Flimsy bargain cables. Cheap cables can crackle, cut out, or snap at the plug. Cheap cable, costly retakes.
Plug types might seem like a small detail, but they decide whether your mic connects cleanly from the start. Once you know what your camera, phone, or recorder expects, the rest falls into place: the right mic, the right cable, and the right adapter.
You don’t need to memorize every connector. Check what your gear has, compare it to the plug on your mic, and buy with confidence. Get the plug right, and your sound gets off to a clean start.
References
- Hybrid Microphone Preamplifier With Variable Selection Of Amplifier Technology — hdl.handle.net (2018)
Questions
What are the different types of wireless microphones?
Wireless microphones are commonly handheld, headset, or lavalier (clip-on) models. Their receivers may connect through XLR, 3.5 mm, or USB, so choose an output that matches your recording device or interface.
What is a type C microphone?
A Type-C microphone uses a USB-C plug, the small reversible oval connector. It has a built-in converter, so it can connect directly to a compatible computer without a separate audio interface.
What color is the mic plug?
On many computers, the microphone jack is pink, while the headphone or line-out jack is green. Colors can vary by device, so check the jack labels if you’re unsure.